Natural Shade Cord Lock Troubleshooting
Although we no longer offer the Cord Lock control, we can troubleshoot and repair these shades in most instances. This guide will show the various issues that may arise and how to fix them. If you are not comfortable making a repair, we can bring the shade into our warehouse for repair or remake the shade as long as the material is still available.
Uneven shade
If the shade is not raising and lowering evenly, there are a couple of things to check and correct.
CHECKING THE RINGS
If the shade is missing any rings or the rings are unevenly spaced (unlikely), the shade will not raise evenly.
Inspect the back of the shade to make sure the rings are all there and they have not gotten caught on anything. If any rings are missing, the shade should be remade. If the rings are getting caught on the cord shroud, you can carefully dislodge the shroud.
THE BREAKAWAY TASSEL HAS COME APART
Sometimes an uneven shade is caused by something as simple as the breakaway tassel coming apart. This tassel is meant to split when enough force is applied as a safety precaution.
Line up the halves of the tassel so that the lift cords are level and snap the two halves together.
<Insert video here when available>
CHECKING THE CORDS AND MECHANISM
Next, you will want to check the cords and mechanism to make sure they are working properly.
Make sure that the cords are not wrapped around each other or tangled. If they are frayed or broken, the cord can be replaced.
See the instructioins for replacing a lift cord
Check that the cords run freely through the pulleys at the top of the shade. If there is an issue with the pulley, it can be replaced.
See the instructions for replacing a pulley
Check that the cords are running freely down the back of the shade and that the shroud is not interfering with the lift cord. Make sure that all of the rings are present and even.
Check that all of the lift cords are in the breakaway tassel. If the cords are not all connected in the breakaway tassel, string the cords that have come loose through the breakaway tassel and tie a knot at the end of the cord to hold it in place. Once all of the cords have been strung back through, close the breakaway tassel by clipping both sides together.
<Insert video here when available>
Raise and lower the shade several times by pulling the lift cords and engaging the cord lock at different levels. Pay attention to the cord lock, if the shade is dropping lower than the other, then the shade needs a new cord lock.
See the instructions for replacing a cord lock
Repairs
There are a few issues with the cord lock shades that the customer can repair, if they are comfortable doing so. If they are not comfortable and the shade is not overly large, we can bring it here, make the repairs for the customer, and ship it back to them. Repairs are a great alternative to remakes especially when the shade is very old and we no longer have the material available and also to avoid dye lot differences.
Replacing a lift cord
Before beginning this repair, take the shade down from the window and lay it on a flat surface.
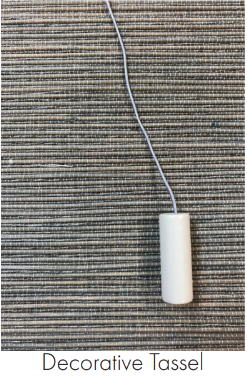
Remove the Breakaway Tassel, Decorative Tassel, and cord stops

Remove the old cord by untying it from the bottom ring. Once it has been untied, gently pull the cord until it comes out through the cord shroud. Then, pull it through the grommet at the top of the shade and through the pulleys and cord lock at the top of the shade.


Tie the new cord to the bottom ring. Then, restring the shade by weaving it through the cord shroud and rings on the back of the shade.

Once you have reached the top of the shade, string the cord through the grommet to the front of the shade and back through the pulleys and cord lock.
To re-string the pulley, push the cord through the side of the pulley and out of the top. To re-string the cord lock, hold the top gear on the cord lock and string the lift cors through the two gears and out.

To finish, reattach the cord stops, breakaway tassel, and decorative tassel.
When reattaching the cord stops (if your shade has them), make sure that the stops are tied evenly on each lift cord. When reattaching the breakaway tassel, make sure that the cords are even and restring them through the holes. Tie a knot on the end of each cord once it has been strung through the tassel to hold it in place.

Replacing a pulley
Before beginning the replacement, take the shade down from the window and lay it out on a flat surface
Untie the cord that runs through the pulley from the bottom ring on the back of the shade.

Pull the string out by gently pulling it through the cord shroud on the back of the shade, through the grommet at the top of the shade, and out of the pulley on the headrail.

Remove the old pulley. Attach the new pulley in the exact location as the old one.

String the cord back through the pulley and down through the rings, making sure the cord goes through the loops of the cord shroud. Once the string has been strung down the back of the shade, retie the lift cord to the bottom ring.

Replacing a cord lock
Before beginning this repair, take the shade down from the window and lay it on a flat surface.
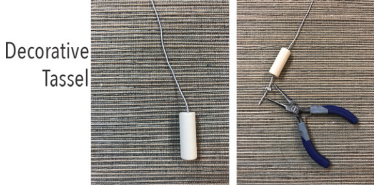
Remove the decorative and breakaway tassels. To remove the decorative tassel, pull the cord out of the tassel, untie the knot, and slide the tassel off. To remove the breakaway tassel, open the tassel, untie the knots, and pull the cords out.

If your shade has clear plastic cord stops, remove them. Note that not all shades are sent with cord stops.

With the headrail turned over, review the position of the cords in the cord lock. The cord lock will be divided into sections separated by a wire. Note the sections that the cords are going through for when you restring the cord lock.
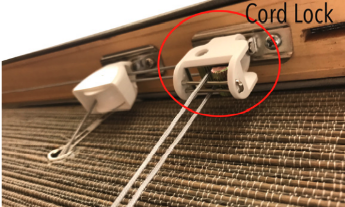
Remove the cords from the cord lock. You can now unscrew the cord lock and replace it in exactly the same position.
The angled side of the cord lock is towards the end of the head rail

Re-thread the new cord lock. Pull the cord through the front of the cord lock, through the gears, and out of the cord lock. It may be helpful to attach a wire to the end of the cords to help pull them through the gears of the cord lock.
The cords should go through the same sections as before

Be sure that the cords do not twist or overlap.

Reinstall the shade in the window.
Lower the hade fully. While lowered, reattach the cord stops about 1-2 inches from the cord lock at the top of the shade, making sure they will be covered by the valance.

To finish, reattach the breakaway tassel and decorative tassel by stringing the cords through the holes in each tassel and securing with a knot at the end.

Was this article helpful?
That’s Great!
Thank you for your feedback
Sorry! We couldn't be helpful
Thank you for your feedback
Feedback sent
We appreciate your effort and will try to fix the article