BlindsChalet Installation Instructions
Roller Shades
Thank you for purchasing your custom roller shades. With proper installation, your shades should look beautiful and provide years of service. Please check all parts and read these instructions before starting installation.
Mounting Hardware Includes:

Tools That May Be Required:
Pencil, Tape Measure, Drill, Screw Driver, Level, and Step Stool
Open Roll
Installing Your Open Roll Shade:
NOTE: For wallboard or plaster, use anchors designed for hollow walls (not included). For concrete, stone and brick, use a masonry drill bit and masonry anchors (not included).Step 1: Install Brackets
- Roller shade brackets can be installed to the wall (face mount) or to the ceiling or underside of the window recess (top mount) [Figures 1 and 2].
- Determine the desired location for the brackets. Mark the position of the brackets and make sure they are the correct distance apart and that they are level and in line with each other.
NOTE: Motorized open roll brackets have a shelf on the control side [Figure 3]. This is where the motor head will be installed. Clutch open roll brackets can be used interchangeably

Step 2: Install Shade
- Insert the shade into the bracket [Figure 4].
- For clutch shades, align the tabs on the ends of the shade tube with the slots of the brackets.
- For motorized shades, install the motor head to the shelf of the control side bracket. Then, push in the pin on the idle end of the shade and move the shade up so that the pin engages with the hole in the idle end bracket.

NOTE: Chain Tensioner Installation
- Shades with clutch controls come with a continuous chain loop, which MUST be secured to the wall with the included chain tensioner.
- See separate instructions for Chain Tensioner Installation.
Cassette
Installing Your Cassette Shade:
NOTE: For wallboard or plaster, use anchors designed for hollow walls (not included). For concrete, stone and brick, use a masonry drill bit and masonry anchors (not included).
Step 1: Install Brackets
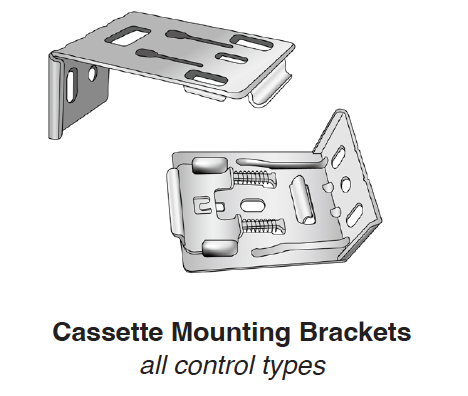
- Your roller shade with cassette will come with brackets for inside (top) or outside (face) mounting. [Figure 5]
1. Before beginning installation, fit the brackets into the cassette. See how the bracket lip fits under the front rib of the cassette, and then push on the back of the bracket to compress it until it snaps in place.
2. Mark the desired position of the brackets with a pencil. Position one bracket about 2” from each end of the cassette, then space out any middle brackets equally (if supplied).
3. Drill pilot holes for the screws.
4. Use provided screws to install brackets. Ensure that brackets are level and in line with each other. If they are not level, the cassette may not snap properly into all of the brackets
Step 2: Install Shade
1. Position the bracket under the front rib on the cassette. Tilt the front of the shade up and hook the bracket lips under the front rib on the top of the cassette.
2. Snap the cassette into place. Now, push the cassette back and up until all brackets snap into place.
Note: Chain Tensioner Installation
- Shades with clutch controls come with a continuous chain loop, which MUST be secured to the wall with the included chain tensioner.
- See separate instructions for Chain Tensioner Installation.
Collection Warranties
Limited Lifetime Warranty
This product is warranted against defects in materials and workmanship, provided that:
1. The product was installed according to the product instructions.
2. Manufacturer recommendations were followed regarding limitations and specifications of the product.
Manufacturer reserves the right to determine if your shade warrants a repair or partial replacement of any parts. If necessary, manufacturer will replace your shade with a new shade of equal or superior value. This shall be your sole remedy under this warranty.
This Limited Lifetime Warranty excludes all motors, controls and accessories that are warranted for only a period of five years from the date of purchase. Failure to follow the proper installation, charging and use instructions will invalidate the warranty for motors, remotes, wands and hubs.
This Limited Lifetime Warranty applies only to the original retail purchaser with proof of purchase.
This Limited Lifetime Warranty does not cover the removal or installation of original or replacement shades. This Limited Lifetime Warranty does not cover damage or defects caused by, or resulting from improper maintenance, neglect or improper use, wear and tear, abuse, neglect, accidents, alteration, commercial use, installation, removal or reinstallation or exposure to excessive moisture.
Your Rights Under State Law
These warranties give you specific legal rights. You may also have other rights which may vary from State to State. In no event shall the manufacturer be liable for incidental or consequential damages or for any other direct or indirect damage, loss, cost, expense or fee. Some states do not allow the exclusion or limitation of incidental or consequential damages, so the above limitation or exclusion may not apply to you. These warranties are exclusive and in lieu of all other obligations, liabilities, disclaimers or warranties.
Was this article helpful?
That’s Great!
Thank you for your feedback
Sorry! We couldn't be helpful
Thank you for your feedback
Feedback sent
We appreciate your effort and will try to fix the article